How do I remove or delete a project?
This article explains how to remove or delete an Overleaf project using the Trashed Projects folder. For help on archiving projects see How do I archive and unarchive projects?
Introduction
Overleaf provides two folders to help organize your projects:
- Archived Projects: for projects you want to keep around (archive) but wish to remove from the main list in your project dashboard.
- Trashed Projects: for projects you intend to delete permanently, or leave, at some future date of your choice.
Quick overview of the Trashed Projects folder
- If you plan to get rid of a project, you can put it in the Trashed Projects folder.
- Moving a project to Trashed Projects does not delete a project or put it in a queue for automatic deletion at a later date.
- You can store projects in Trashed Projects for as long as you like. You have to manually delete a project to permanently remove it.
- When you decide it’s time to remove a project from your Trashed Projects folder, you can choose to
- For any project that you own, deleting it will permanently remove it, both for you and your collaborators. Note: There is no undo!
 ) any projects on which you are a collaborator (projects you do not own).
 ) (permanently) any projects that you own.
 ) projects to move them back to the main project list.
 ) any project and move it to the Archived Projects folder.
How does trashing a project affect collaborators?
- Putting any project in the Trashed Projects folder won’t affect collaborators on that project—it only affects where the project appears on your projects page.
- You cannot delete projects shared with you; i.e., projects that you do not own and where you are a collaborator. You can only archive them or place them in Trashed Projects and then Leave them.
- You can delete only those projects that you own. Deleting a project will permanently remove it—for you and any collaborators on your project. Note: There is no undo!
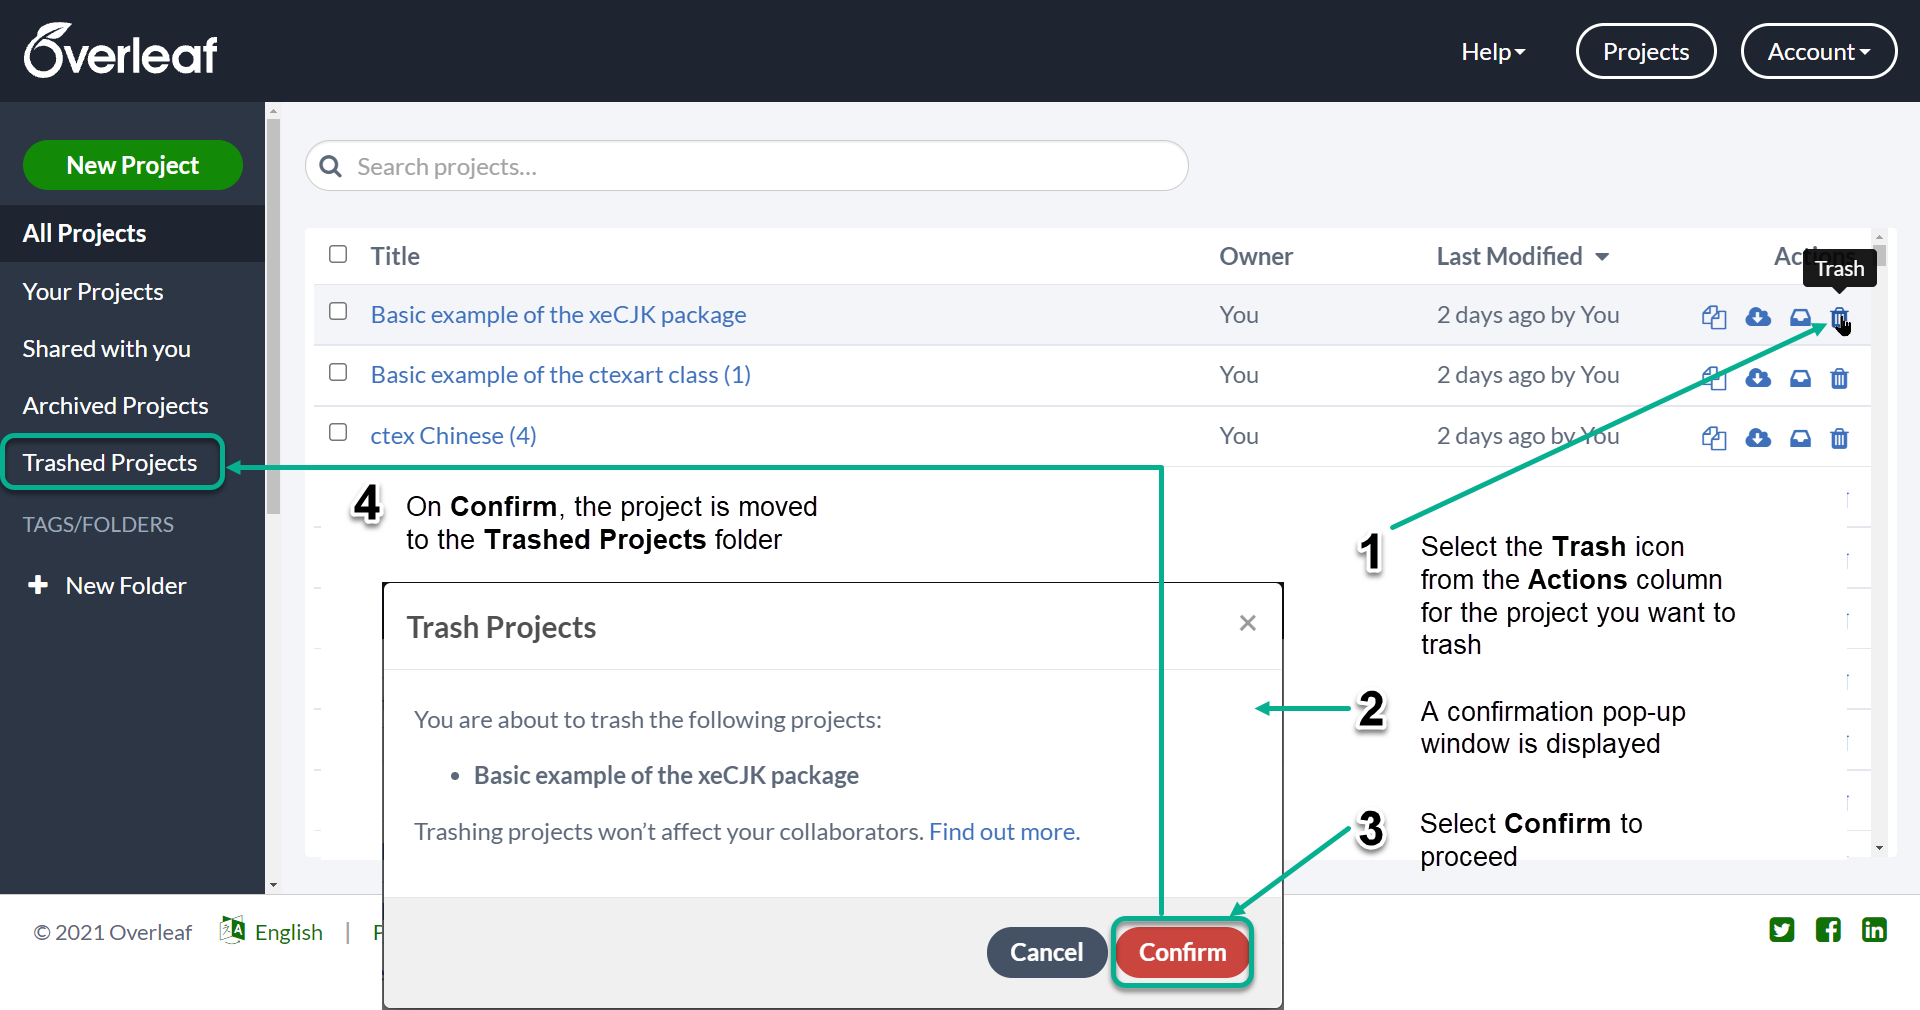
Moving a single project to the Trashed Projects folder
To trash a single project follow these steps which are also shown in the screengrab below:
- For the project you wish to trash, select the Trash icon in the Actions column.
- A confirmation pop-up window is displayed.
- Select Confirm to move the project to the Trashed Projects folder (where it stays until you choose to delete it).
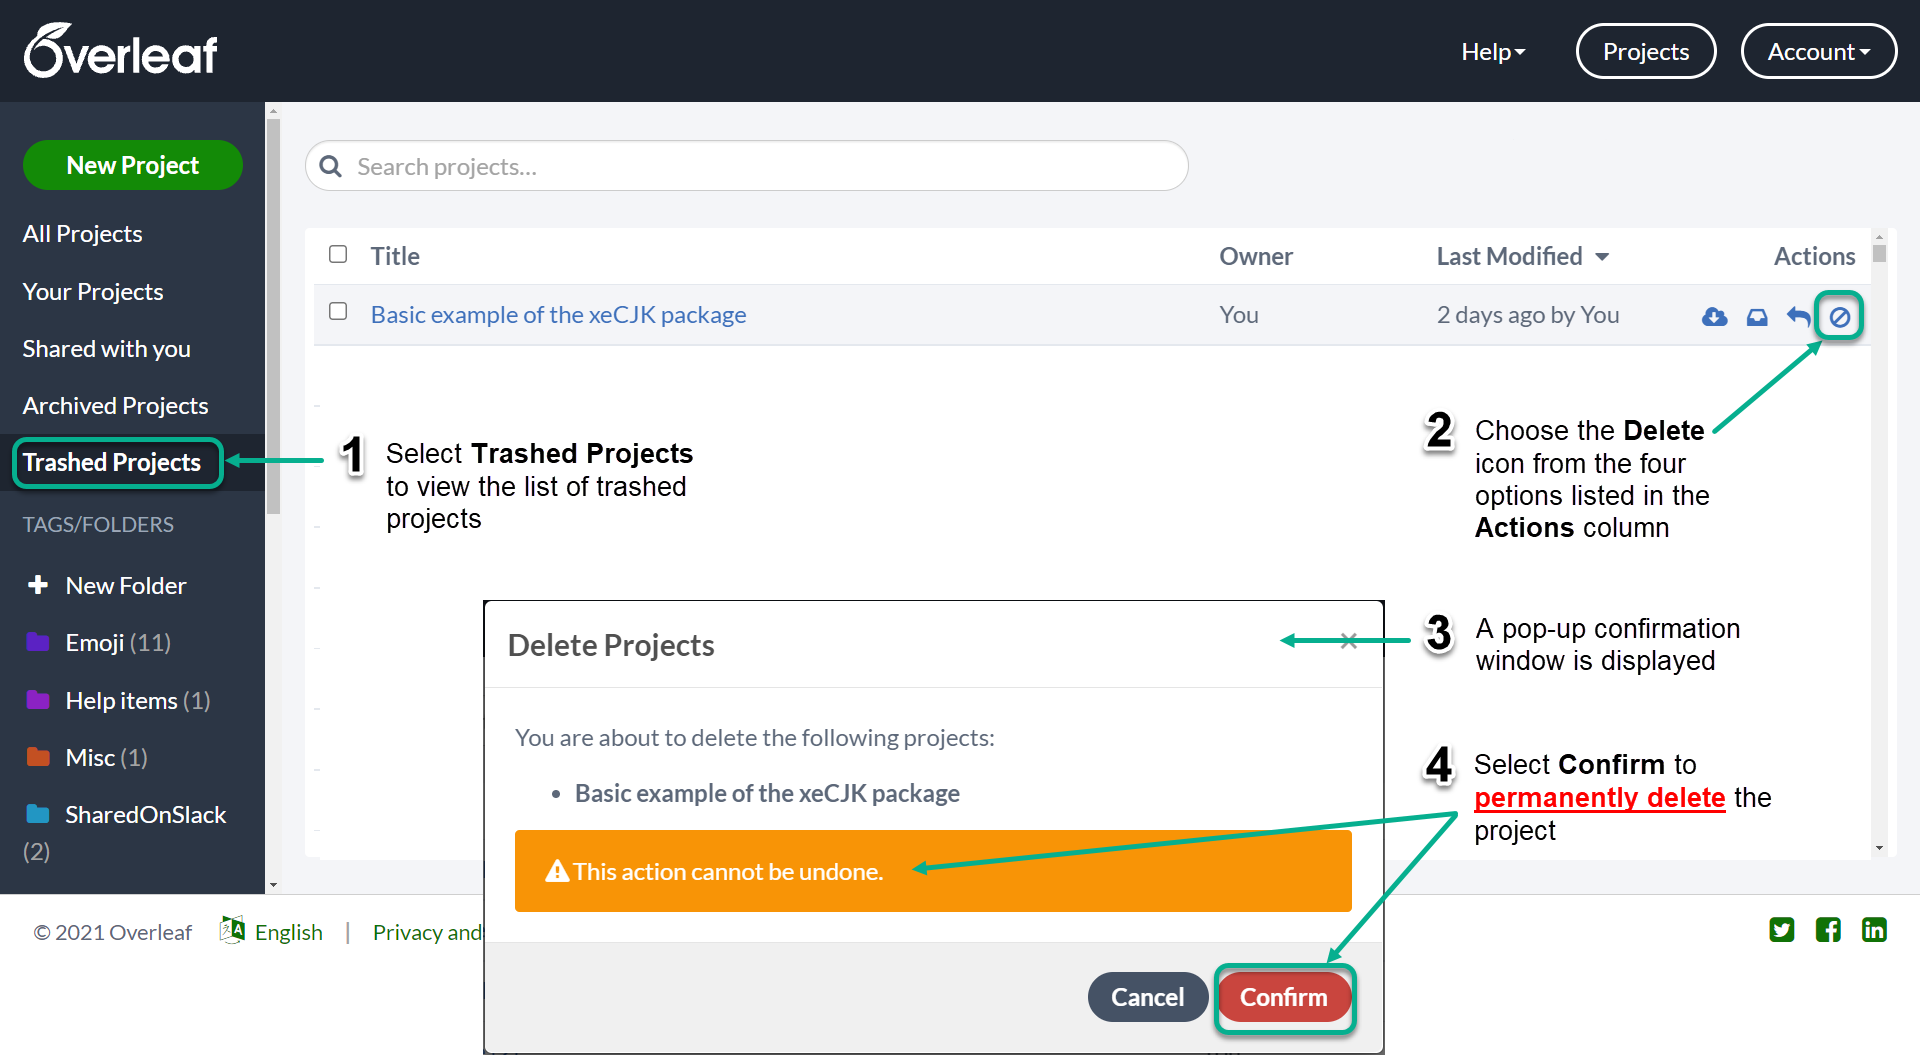
Permanently deleting a project in the Trashed Projects folder
Note: There is no “undo deletion” feature: before proceeding, please be certain you wish to permanently delete your project.
To permanently delete a project follow these steps, which are also shown in the screengrab below:
- Select Trashed Projects to view the list of trashed projects.
- For the project you wish to delete, choose the Delete icon from the four options listed in the Actions column.
- A pop-up confirmation window is displayed.
- Select Confirm to permanently delete the project.
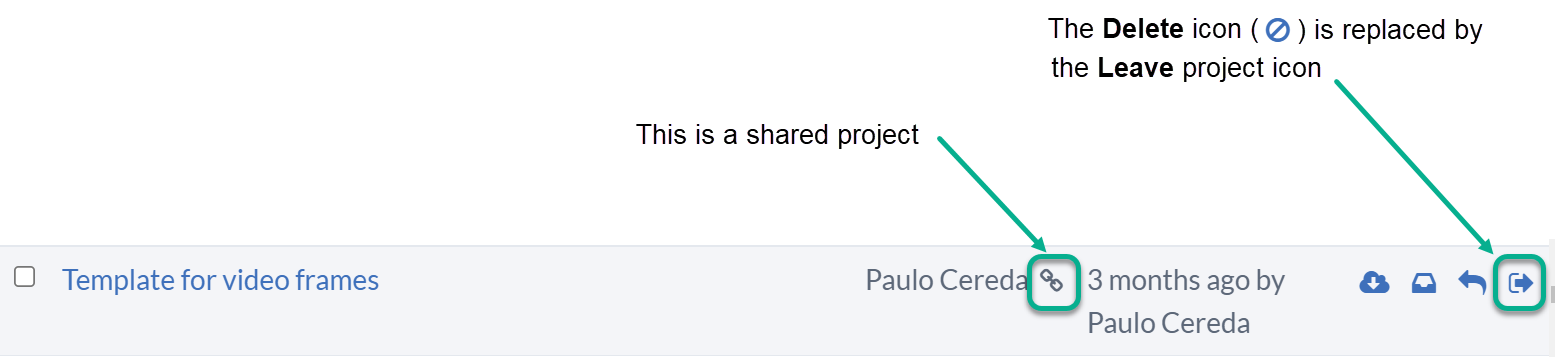
Note: You cannot permanently delete shared projects not owned by you. If you move a shared project into the Trashed Projects folder you have the option to Leave that project but not to Delete it: the Delete icon is replaced by the Leave icon, as shown in the following screengrab:
Moving multiple projects to the Trashed Projects folder
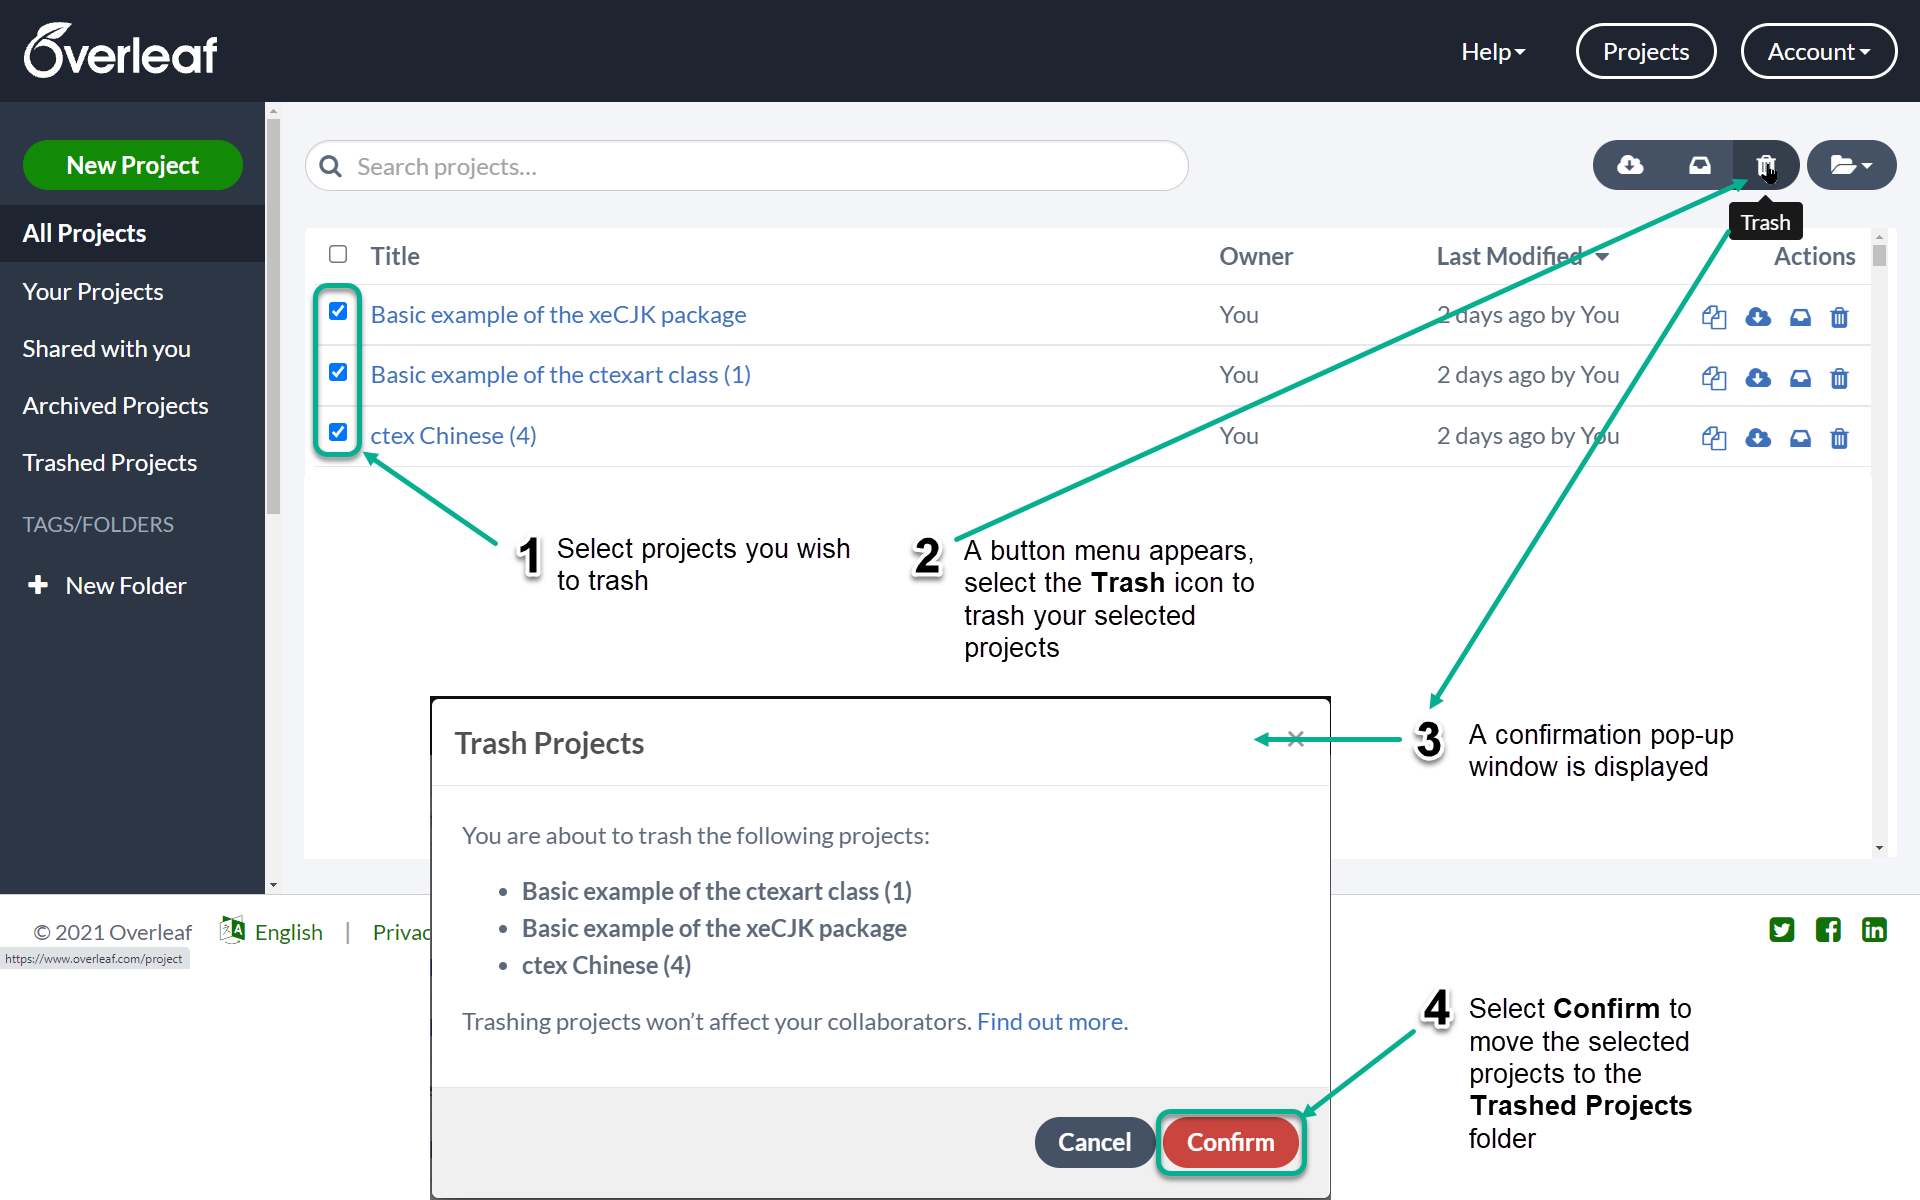
To trash multiple projects follow these steps, which are also shown in the screengrab below:
- For each project to be trashed, select the check box next to the project title.
- From the button menu (see screengrab below), select the Trash icon to trash your selected projects
- A confirmation pop-up window is displayed
- Select Confirm to move the selected projects to the Trashed Projects folder
Permanently deleting multiple projects
Note: There is no “undo deletion” feature: before proceeding, please be certain you wish to permanently delete your selected projects.
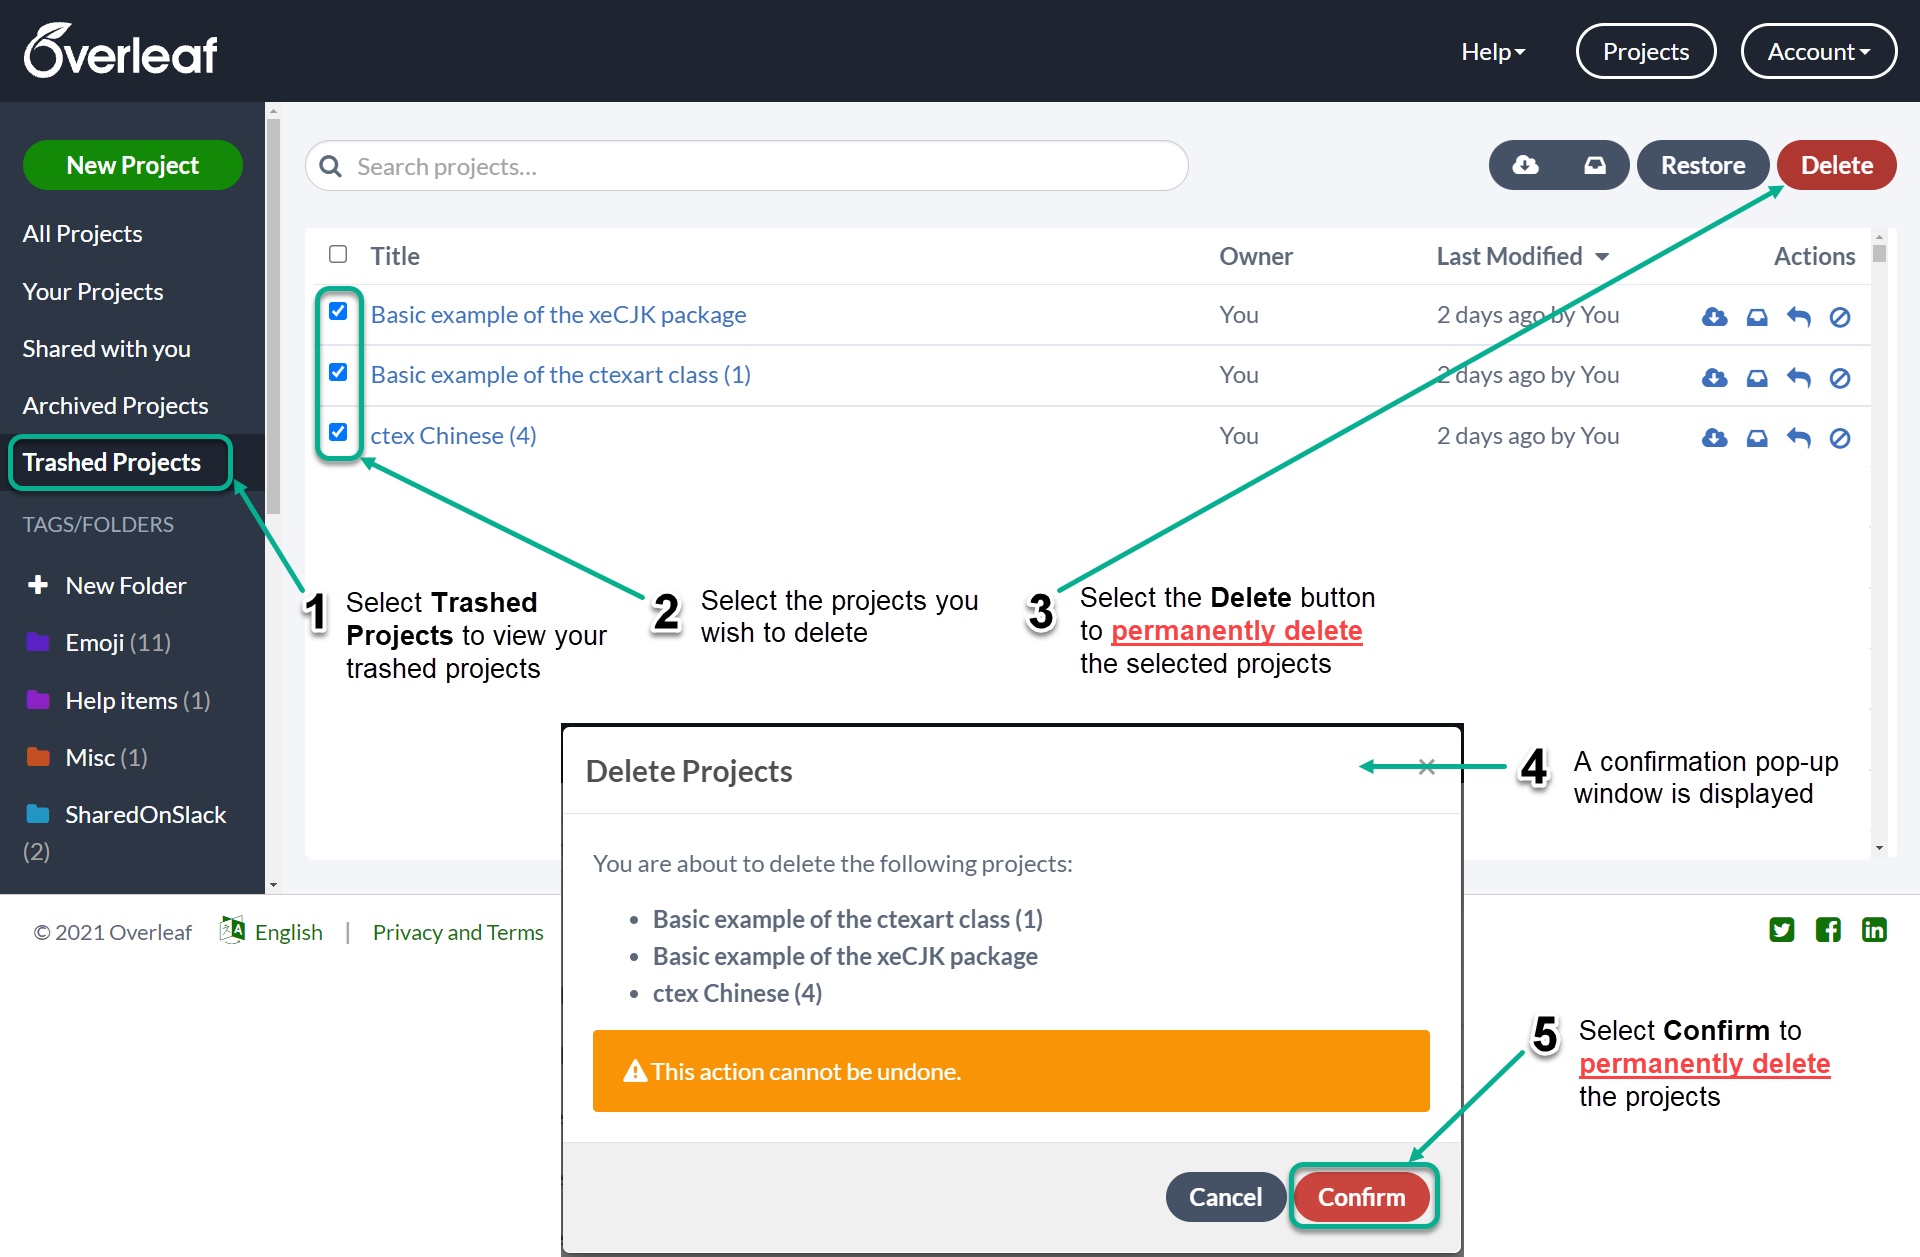
To permanently delete multiple projects follow these steps, which are also shown in the screengrab below:
- Select Trashed Projects to view the list of trashed projects.
- For each project to be deleted, select the check box next to the project title.
- Select the Delete button (see screengrab below) to delete your selected projects
- A confirmation pop-up window is displayed.
- Select Confirm to permanently delete the selected projects.
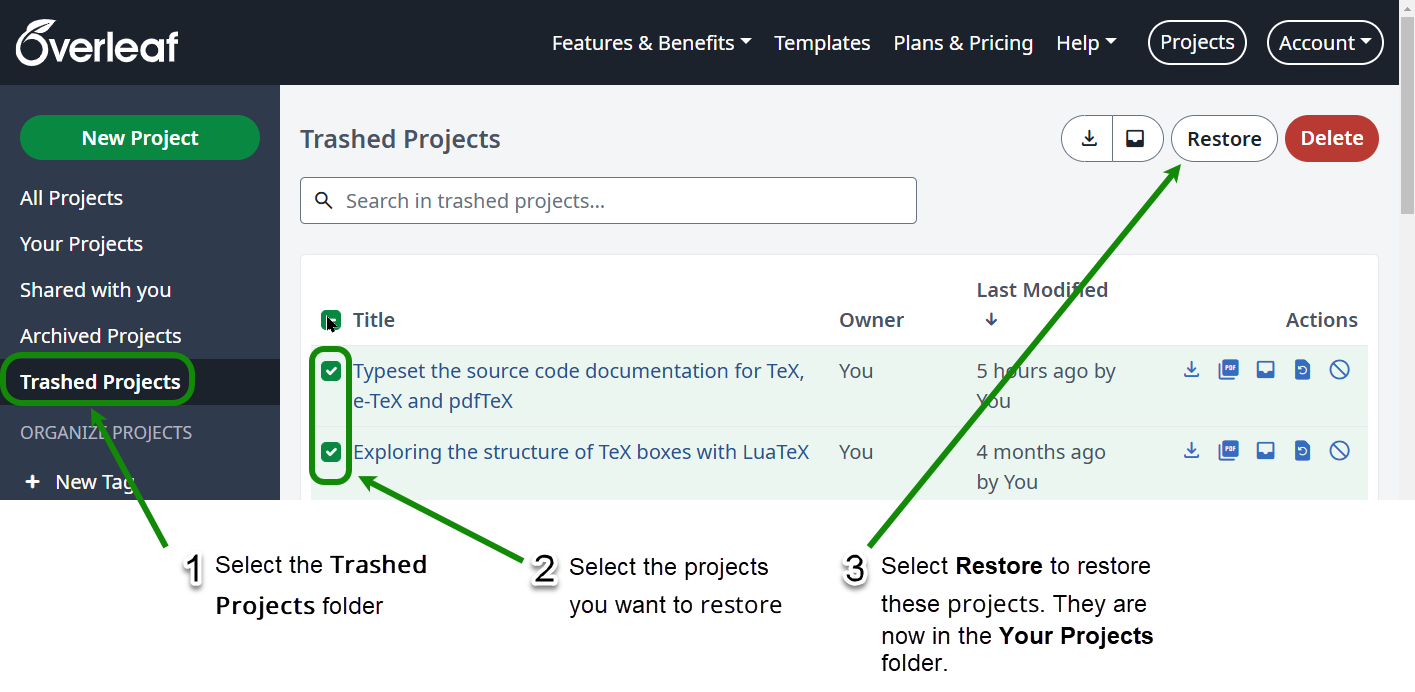
How to restore a trashed project
Follow these steps to restore projects contained in the Trashed Projects folder.
- Select Trashed Projects to view the list of trashed projects.
- For each project to be restored, select the check box next to the project title.
- Select the Restore button (see screengrab below) to restore the selected projects. They are now listed in the Your Projects folder, ready for further editing.